Hip abduction builds the muscle that keeps your knee tracking straight on every squat, lunge, and step down a curb — and for some people, it produces a kind of relief through the hip and lower back that nothing else in a lower-body session does.
The catch is that the muscle doing that job is one of the quietest in the body. It doesn’t move a joint through a big range, none of the big lifts load it directly, and most people train for years without ever asking it to work on its own. Hip abduction is a small, deliberate fix for a muscle that punches well above its size.
What Is Hip Abduction?
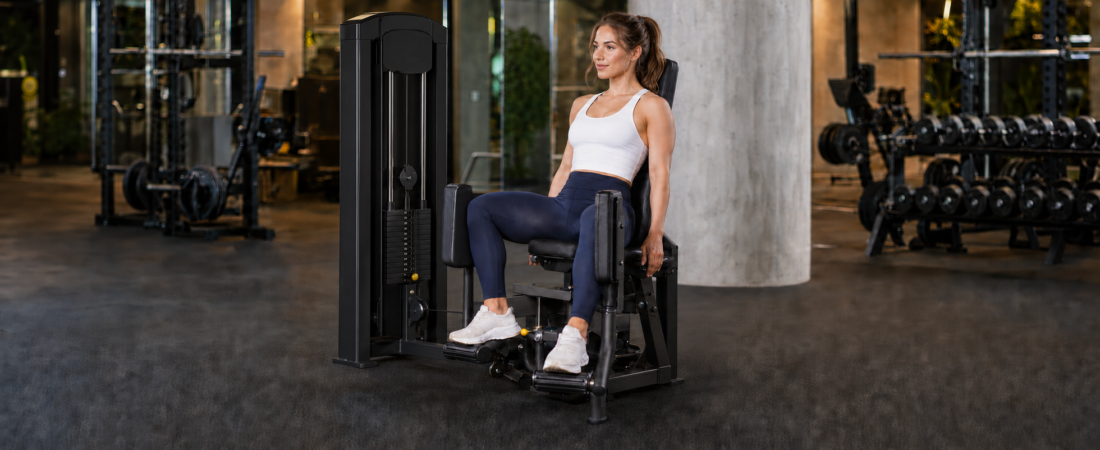
Hip abduction is an isolation exercise where you move your leg away from the midline of your body against resistance — usually on a seated machine that pushes your knees outward, though a cable with an ankle strap or a band looped around your thighs do the same job.
It trains the gluteus medius, the muscle on the side of your hip, whose job is to hold your pelvis level and your knee lined up over your foot whenever you’re standing on one leg. Nothing in a typical squat, deadlift, or press session asks this muscle to work on its own; hip abduction is the one movement that does.
What You Need
A hip abduction machine is the standard setup. A cable machine with an ankle strap does the same job in reverse, pulling the leg outward instead of pushing against it. A mini-band looped around your thighs works anywhere — lighter than the machine, but enough to feel it without gym access.
How To Do It
Sit in the machine with your back flat against the pad and the outer pads resting against your thighs, knees starting together. Push your knees outward against the pads through a controlled range, pause for a beat at the widest point, then bring your knees back together slowly, resisting the stack the whole way rather than letting it pull you back.
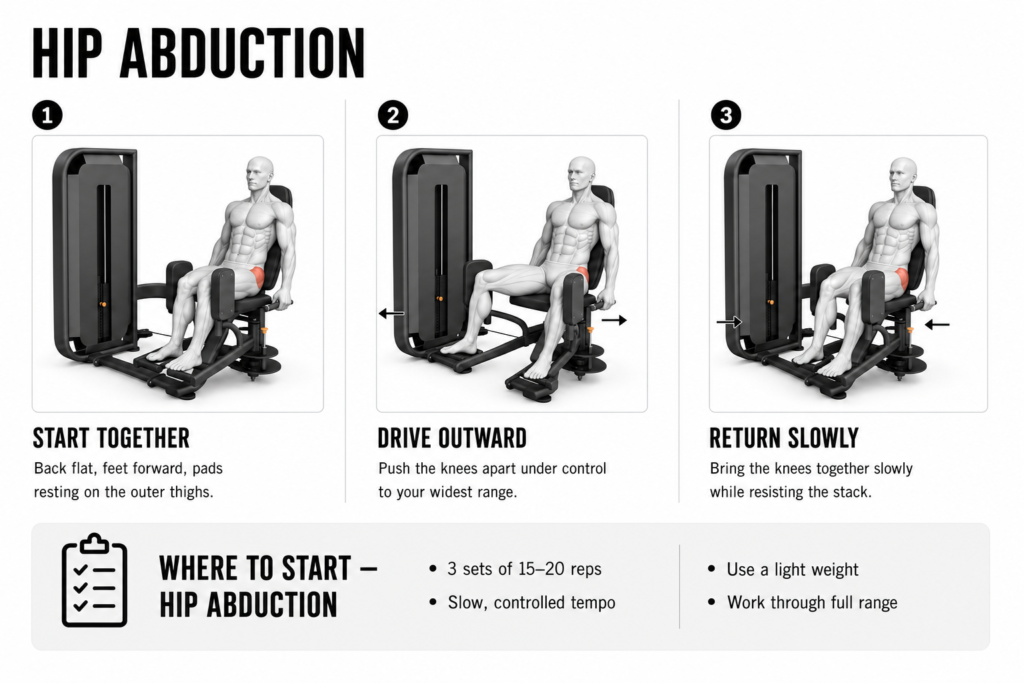
- Control the way back in as hard as the way out — releasing it lets the stack do the work instead of the muscle
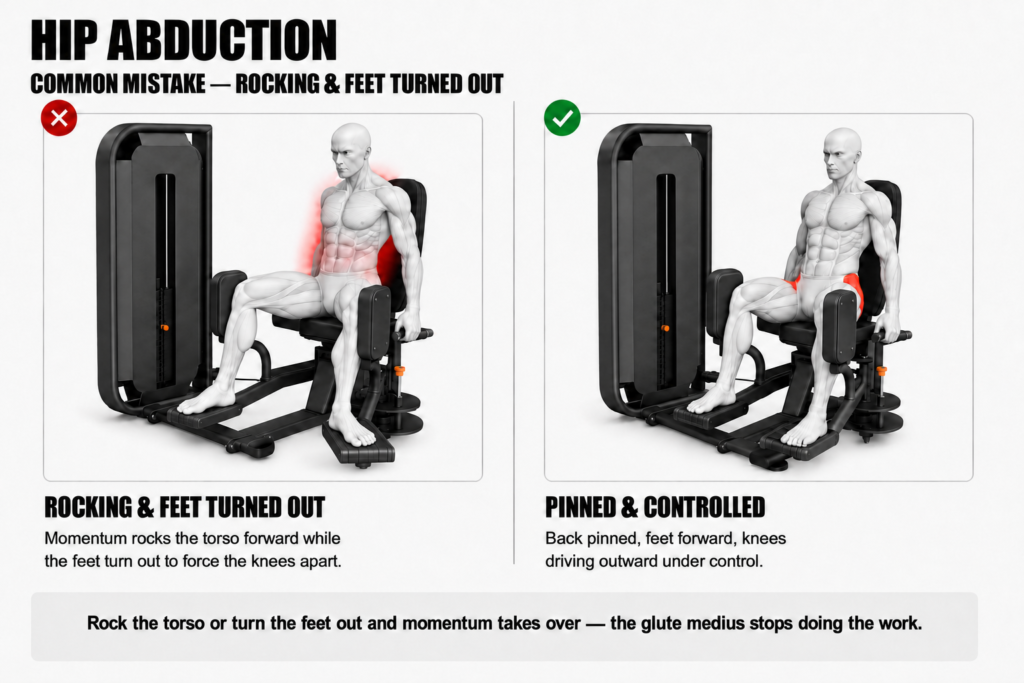
- Keep your torso still against the pad — rocking or leaning turns a hip exercise into momentum
- Push through a full range each rep, not a short pulse
Perfect Form
This is one of the slower exercises to feel working — and almost everything that speeds it up comes down to a handful of small positions. Here’s each one, and why it matters.
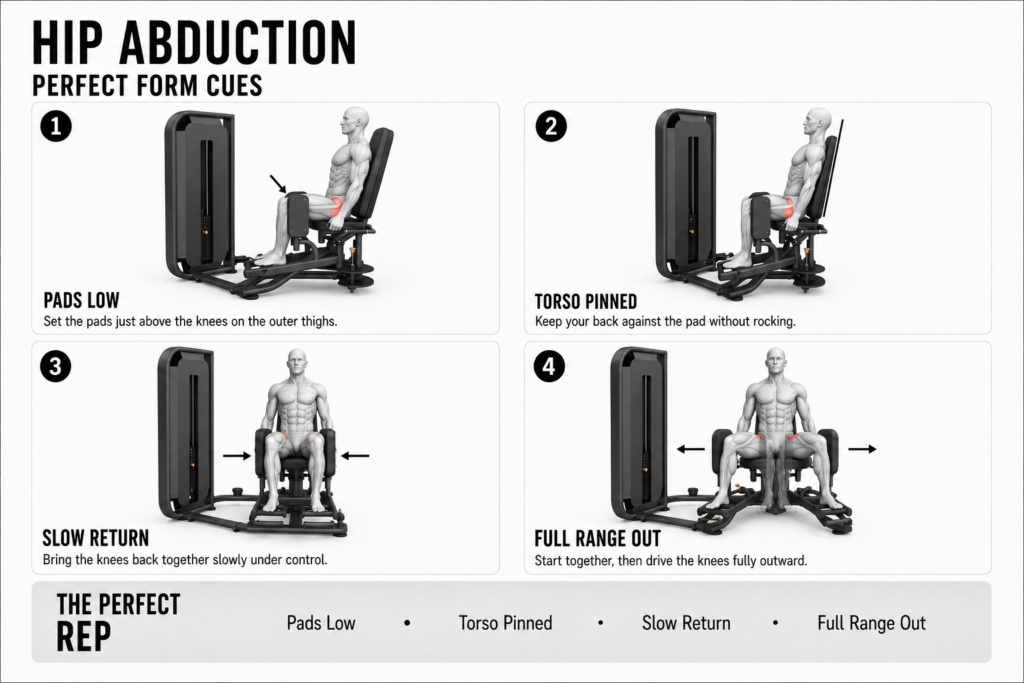
Set the pad against your lower thigh, not higher up near your hip. Contact closer to the knee gives the glute medius a longer lever to work against, and it’s the single biggest difference between a rep that produces nothing and one that produces an obvious burn. If a session feels dead no matter the weight, check this before you check anything else.
Pin your torso flat against the back pad. The moment your torso starts rocking or leaning into the movement, momentum is doing some of the work the glute medius should be doing alone. Stay still and let the leg move by itself.
Control the way back in. The stack wants to pull your knees back together on its own — resist it the whole way rather than letting it happen to you. This half of the rep is where a surprising amount of the work actually lives.
Start every rep from knees together. Cutting the range short at the top means cutting off the part of the movement where the muscle is most stretched and working hardest to control the return.
What You Should Feel
A specific, deep burn on the outer hip — not the front of the thigh, not the top of the glute, and not your lower back. Done right, it’s a sensation that doesn’t really resemble anything else in a lower-body session.
Give it a few sessions before judging whether it’s working — early on it can feel like the machine isn’t doing much even with reasonable form, and that’s a setup problem to solve, not a sign the exercise isn’t for you.
For some people, hip abduction also brings a distinct kind of relief through the hip and lower back that heavier compound lifts don’t touch — if that’s you, it’s worth treating this as a regular piece of the program rather than an occasional accessory.
Muscles Worked
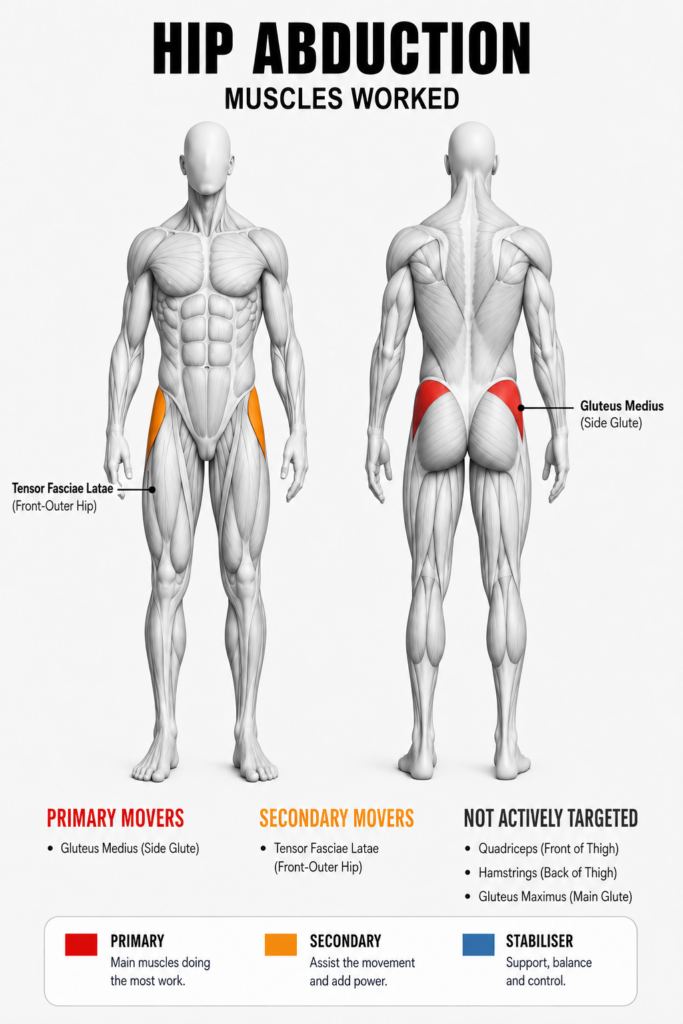
The glutes (gluteus medius) are the prime mover — the muscle on the side of your hip responsible for pulling your leg away from your body and for holding your pelvis level and your knee aligned every time you’re on one leg. It’s a small muscle doing a constant, quiet job, and this is the one exercise that trains it in isolation.
The tensor fasciae latae, on the front-outer hip, assists through the same motion — neither muscle gets meaningful direct work from a squat, deadlift, or lunge; they’re stabilising there, not driving the movement.
Common Mistakes
Loading more weight than the glute medius can actually move
Past a certain point, more weight doesn’t buy a stronger contraction — it buys a shorter range and a rushed rep. If your reps are getting quicker and choppier as the stack climbs, the muscle has already lost the job to momentum. Drop the weight and let control set the ceiling.
Letting your feet turn outward to help
Rotating your feet out brings the hip flexors and rotators into the movement instead of the glute medius — an easy habit once a set gets hard. Keep your feet forward and the effort stays where it belongs.
Benefits & Why It Transfers
The direct payoff is a knee that tracks straight under load — a glute medius doing its job is what stops the knee caving inward at the bottom of a squat or a lunge.
Outside the gym it’s the muscle that keeps your pelvis level and your knee lined up every time you’re on one leg — which is most of walking, every stair, and every uneven step. A hip that holds its position there is a hip that’s doing less damage control on everything else you do standing up.
How To Programme It & Where It Fits
Three sets of 15 to 20 reps, slow and controlled, with a weight light enough that torso stillness never breaks. This is high-rep isolation work by nature — the muscle is small and responds to control and time under tension, not load.
Put it at the end of a squat or lower-body session, once the big lifts are done, or run it as a standalone hip-health piece on any day — the load is light enough that it won’t interfere with anything else in the week. It pairs naturally with the barbell back squat and the knee-tracking cue in dumbbell lunges — the same muscle backs both.
It’s the same case behind isolation work generally — a tool for the specific piece a compound lift can’t train on its own. The isolation training hub makes the full argument.
Hip Abduction FAQs
Machine, cable, or band — which hip abduction should I do?
Whichever you have access to — the muscle doesn’t know the difference between the three. Match the tool to what’s available rather than hunting for the “best” version.
Does hip abduction help with knees that cave in on squats?
Yes, directly. A knee caving inward under load is usually the glute medius failing to hold the hip and knee in line, and hip abduction is the most targeted way to train that muscle back up. It won’t fix a knee cave overnight, but it’s a more direct fix than adding more squat volume on its own.
Join The Conversation
Has a stronger hip changed how your knee tracks on squats or lunges — or did hip abduction take longer to click for you than every other exercise in your program? Drop a comment and let me know.