Negative pull-ups are one of the least understood entry points into pull-up training. Most beginners think you either do a full pull-up or you don’t — so they skip them entirely or default to band-assisted reps that don’t teach the movement properly. But negatives are something else: a focused way to build the upper-body strength and control you actually need, using only gravity and your bodyweight.
The real problem is that beginners jump into negatives without a clear plan for how long to hold the eccentric phase or when to progress. They either rush through them and miss the strength-building window, or they stay stuck repeating the same thing without ever moving forward. Both approaches leave you frustrated and spinning your wheels.
This guide walks you through proper negative pull-up form, exactly how long the descent should take, and what to pay attention to so you’re building real pulling strength — not just hanging. Then we’ll cover how to progress to a neutral grip chest to bar pull-up, a natural and measurable next step that opens the door to fuller pull-up variations.
Like all good strength work, this pair of movements only pays off if you’re consistent and you understand how they fit into a broader plan. Here’s how to structure your workouts as a beginner so this kind of work actually has a place to live.
What Is This Exercise?
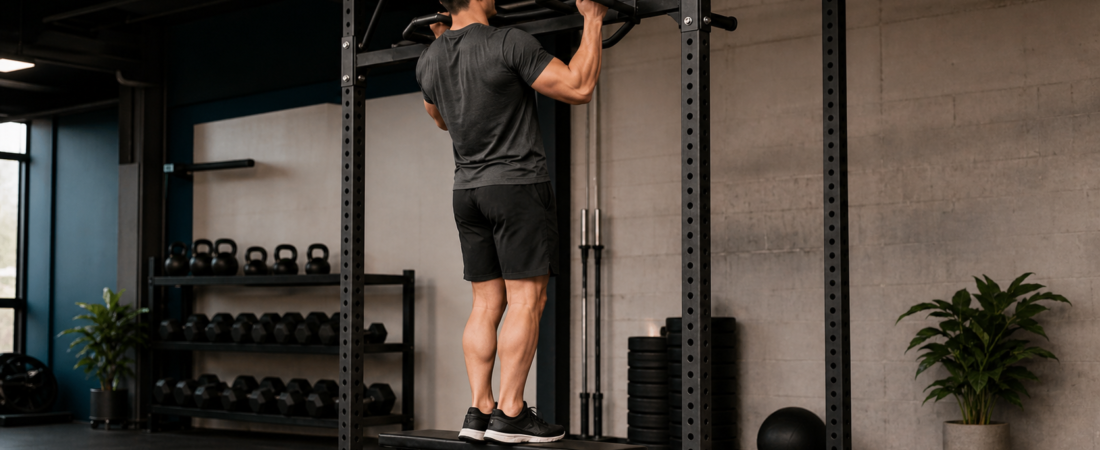
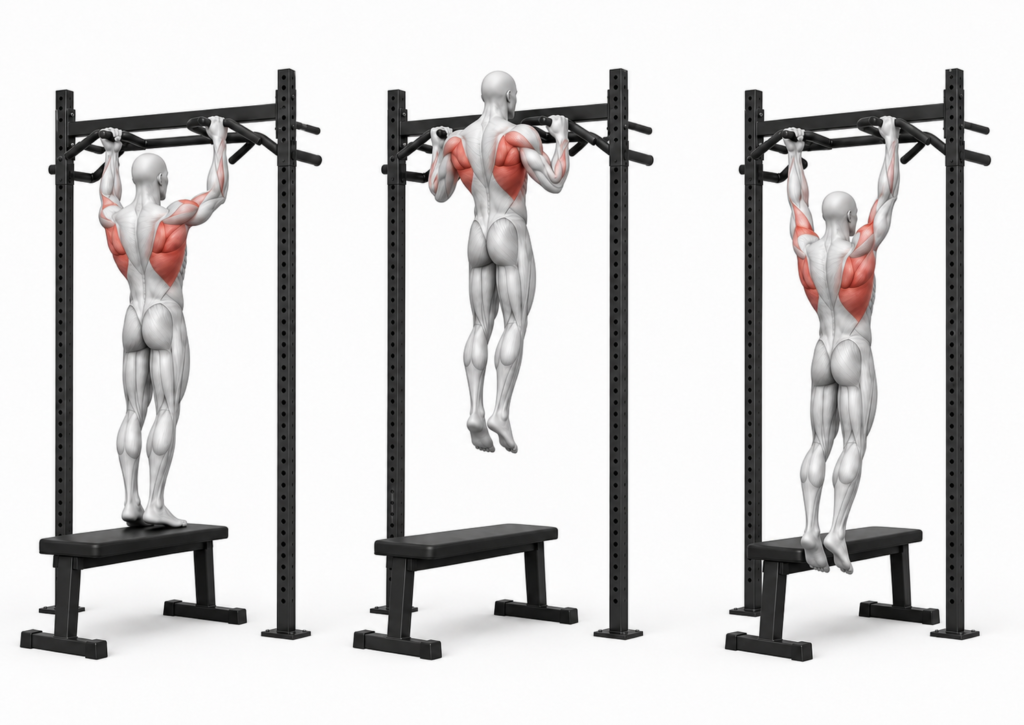
A negative pull-up is a pull-up variation where you start at the top position — chin above the bar — and lower yourself slowly to a dead hang. It trains the back, biceps, and shoulders using the lowering phase of the pull-up, building the strength needed to eventually pull yourself up from a dead hang.
What you need: A pull-up bar.
This is a vertical pull movement — you pull your body upward toward a fixed point above you, the same motion you use climbing a ladder.
Negative Pull-Ups
Sets & Reps
- Sets: 3–5
- Reps: 3–5 per set, with a 3–5 second descent on each rep
- Rest: 90–120 seconds between sets
How To Do It
Jump or use a bench to get to the top position with your hands just wider than shoulder-width and your chin above the bar. From there, lower yourself as slowly as you can control — aim for 3 to 5 seconds on the way down — then drop or step down once your elbows reach about 90 degrees.
When you can perform 5 reps with a 5-second descent and still feel in control, you’re ready to progress to the neutral grip variation or add a light weight belt for extra challenge.
Key Points To Pay Attention To
- Keep your shoulders packed — slightly retracted, not shrugged up to your ears — throughout the entire descent.
- Elbows should stay tucked closer to your ribs, not flaring out wide. This keeps tension on your back instead of dumping it into your shoulders.
- Lower at a steady pace; resist the urge to let gravity take over halfway through.
- Your core should feel engaged the whole time. Don’t let your lower back arch or your hips swing forward.
- Think about pulling your elbows toward your hips rather than just “going down” — this cue keeps the pulling muscles active.
- Grip the bar firmly with full palm contact, not just your fingers.
What You Should Feel
- Tension building in your lats — the muscles on the sides of your back — from the start of the descent.
- Your shoulders working to control the lowering, not burning out.
- Your core engaged, keeping your body stable and straight.
- A steady, controlled strain — not sharp pain or joint discomfort.
If your shoulders are doing all the work and your back feels passive, you’re flaring your elbows too wide. Narrow them slightly and think about pulling down with your elbows instead of just lowering your arms.
Who This Is For
- Beginners who can’t yet perform a single strict pull-up.
- People returning to training after time off who want to rebuild pull-up strength safely.
- Anyone who wants to understand what a proper pull-up descent should feel like before trying to go up.
Why This Movement Matters
Negative pull-ups isolate the hardest part of the movement — the eccentric phase, where your muscles lengthen under load. This is where most of the early strength is built. For beginners, that’s a huge advantage. You don’t have to generate the upward power yet. You just have to control the descent, which removes the mental and physical barrier that stops most people from ever trying pull-ups at all.
They also teach your nervous system what a pull-up actually feels like from the top down. You learn where your shoulders should sit, how your lats should engage, and how your core needs to stay stable. That knowledge transfers directly when you start building upward strength later. Without it, you end up doing half-reps with sloppy form and wondering why you’re not making progress.
The strength you build here is real and transferable. A solid eccentric foundation means the tendons and connective tissue in your shoulders and elbows adapt properly. You’re not rushing into a full pull-up with unprepared joints — you’re building the foundation that holds up under heavier work later.
Negative pull-ups build real pulling strength by forcing you to control the descent, and that controlled descent teaches your body exactly what a pull-up should feel like.
Neutral Grip Chest to Bar Pull-Up
Sets & Reps
- Sets: 3–4
- Reps: 1–5 per set — quality over quantity
- Rest: 2–3 minutes between sets
How To Do It
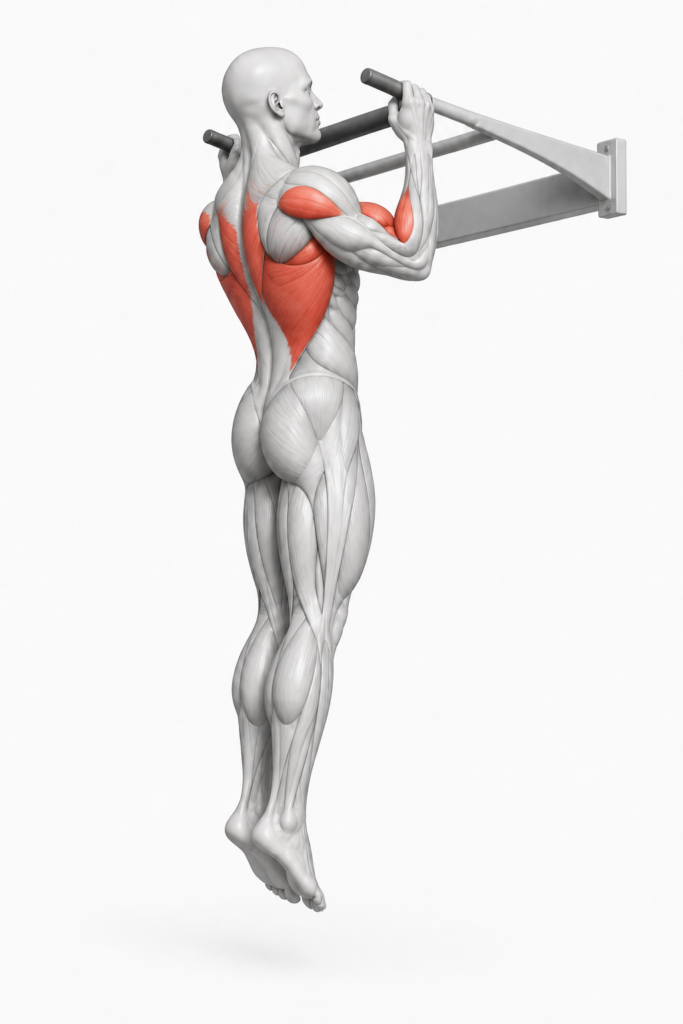
Use a neutral grip — palms facing each other — if your gym has parallel handles or a neutral bar attachment. If not, use an assisted machine or bands to reduce the load while you learn the movement. From a dead hang, pull yourself upward and slightly back, aiming to bring your chest toward the bar. Your elbows should stay tucked and drive down and slightly back.
You’re ready for this progression when you can consistently perform 5 negative pull-ups with a 5-second descent and feel solid control. Start with 1 rep per set and add reps only when you can do multiple clean reps without struggling or losing form.
Key Points To Pay Attention To
- The neutral grip naturally keeps your elbows in a stronger position and shifts more load to your lats and less to your biceps — pay attention to that feeling.
- Drive your elbows down and back as the main cue, not “pull yourself up.”
- Keep your shoulders packed — retracted, not shrugged — at the top of the movement.
- Your chest should approach the bar. This range of motion teaches full engagement of your back muscles.
- Avoid kipping or using leg momentum. This is about control and back strength, not explosive power.
- Lower yourself under control — take 2–3 seconds — to reinforce eccentric strength and prepare for your next rep.
- If you’re using assistance, use enough support that you can do 3–5 reps with good form.
What You Should Feel
- Strong engagement in your lats and mid-back as you pull.
- Your shoulders working but not burning or straining — they’re supporting, not dominating.
- Your core staying locked in place the entire time.
- A sense of pulling strength rather than arm strength driving the movement.
If your biceps are cramping before your back feels worked, you’re pulling with your arms instead of your elbows. Reset your mind to “elbows down and back” and lighten the load if needed.
Who This Is For
- Beginners who have built solid eccentric strength from negative pull-ups and are ready to generate upward power.
- People looking to progress pull-ups in a linear, measurable way without jumping into harder variations too fast.
- Anyone wanting to build pulling strength that transfers to bent-over rows, deadlifts, and other pulling movements.
Why This Movement Matters
The neutral grip chest to bar pull-up changes the demand in two important ways. First, it requires you to generate upward power, not just control a descent. Second, the neutral grip naturally stacks your joints in a stronger, safer position. Your elbows stay tucked, your shoulders stay packed, and the load distributes across your back muscles instead of overwhelming your biceps or straining your shoulders.
This progression builds directly on the negative work you’ve done. You’ve already learned what a pull-up should feel like from the top down. Now you’re learning to build yourself back up to that position. The eccentric strength you built gives you a foundation; the concentric strength you’re building now teaches you to generate power.
The chest to bar standard is also objective and measurable. You either touch your chest to the bar or you don’t. That removes ambiguity and gives you a clear goal — which matters for beginners, because it keeps you motivated and makes it obvious when you’ve actually progressed.
Neutral grip chest to bar pull-ups teach you to pull with power while the neutral position keeps your joints safe and your back doing the work.
Muscles Worked — What’s Actually Happening
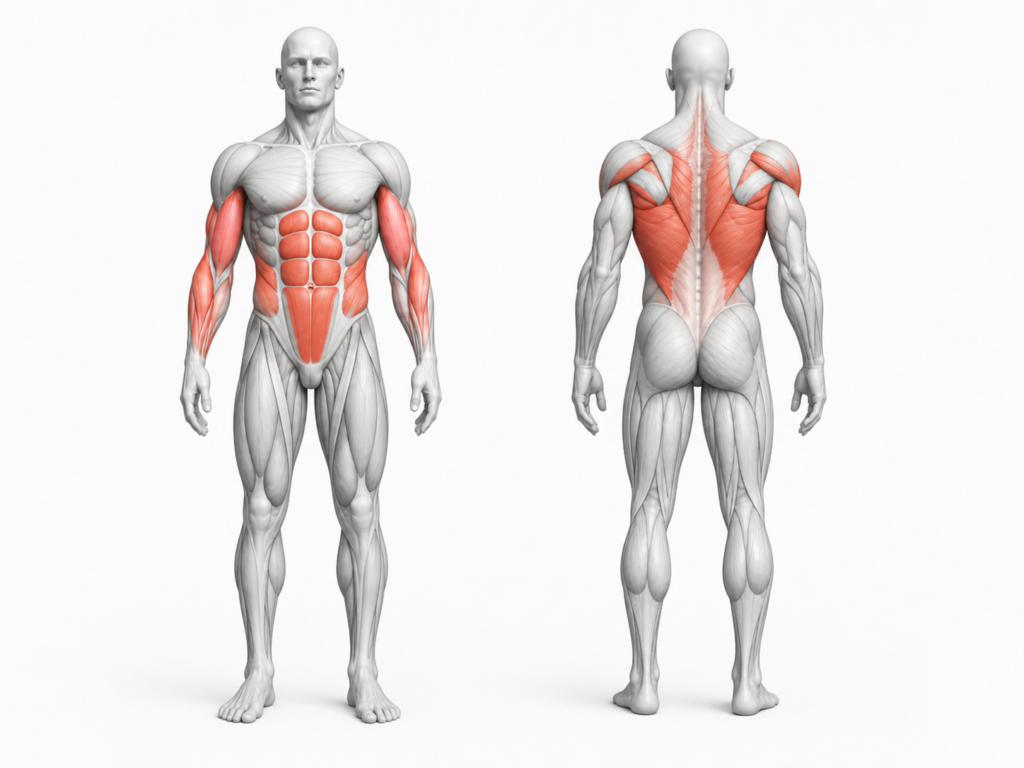
The main muscles doing the work in both exercises are the big ones along the sides and middle of your back — your lats, which run down the sides of your back and create that V-shape, and the smaller muscles between your shoulder blades that pull your shoulders down and back. In simple terms, these muscles bring your arms down toward your body and pull your elbows behind you. That’s the whole job of a pull-up.
The secondary muscles shift between the two exercises in a way worth understanding. In a negative pull-up, your biceps and forearms are along for the ride, helping you control the descent — but because you’re not generating upward force, the demand on them stays moderate. The chest to bar pull-up changes that. Now your biceps and forearms have to actively help drive you up, and your core has to work harder to keep your body from swinging. The neutral grip helps here because it keeps your elbows in a stronger line and prevents your arms from taking over the way they would with a regular grip.
One thing beginners rarely think about is the balance between pulling and pressing muscles. The muscles that pull you up to the bar work opposite the ones that press you away from the floor in a push-up or bench press. If you only train one side of that equation, your shoulders end up in a bad spot — rounded forward, weaker, and more prone to nagging issues. That’s why pulling work isn’t optional. It keeps your shoulders honest.
Last thing worth knowing: in your first few weeks of pull-up training, you’ll get stronger before you look any different. That’s your nervous system learning the movement — figuring out which muscles to fire, when, and how hard. Size comes later. So if you feel stronger but don’t see changes in the mirror yet, that’s exactly what’s supposed to happen.
Negative Pull-Up FAQs
How long should a negative pull-up take?
Aim for 3 to 5 seconds on the way down — lowering as slowly as you can control from chin-over-bar until your elbows reach about 90 degrees. When you can do 5 reps with a 5-second descent and still feel in control, you’re ready to progress.
How many negative pull-ups should a beginner do?
3–5 sets of 3–5 reps, with a 3–5 second descent on each rep and 90–120 seconds rest between sets.
Do negative pull-ups actually help you do a full pull-up?
Yes — negatives train the back, biceps, and shoulders using the lowering phase of the pull-up itself, building the strength needed to eventually pull yourself up from a dead hang. You’re practising the real movement, not an approximation of it.
How do you get into position for a negative pull-up?
Jump or use a bench to get to the top position — chin above the bar, hands just wider than shoulder-width. The exercise starts at the top, not the bottom.
Where This Fits
Negative pull-ups sit in a specific place in beginner training. They’re compound pulling movements that demand full-body stability and real back strength. They’re not isolation exercises, and they’re not warm-up work. They’re foundational strength work that teaches your nervous system and muscles what serious pulling feels like. Once you’ve built confidence and strength here, you have a pulling base that supports bent-over rows, deadlifts, and harder variations down the line.
What makes this progression work is repetition and patience. You won’t do a full pull-up in a week. But if you follow the progression consistently — working negatives first, then moving into band assisted pull-ups as your strength builds — your body will adapt. Pulling movements are complex and demand respect. Throwing them into a random routine won’t teach you anything. Placing them in a structured program where you repeat them, measure progress, and move forward methodically is where the real adaptation happens.
You’ll also notice that pull-ups improve other movements. Your rows get stronger. Your deadlifts feel more stable. Your core learns what tension means. That’s because pulling strength is fundamental strength — not a vanity movement. If you want to understand how work like this connects to everything else you’re building, the three pillars of fitness lays out exactly how training, nutrition, and mindset work together from the beginning.
One thing most beginners overlook is what happens after the session. The strength you’re building from negatives doesn’t come during the set — it comes during recovery. Understanding where strength is actually built will change how seriously you treat sleep, rest days, and eating enough to support the work you’re putting in.
Join the Conversation
Pull-up training brings up more questions than almost any other movement. If you’re working through this progression, I want to hear how it’s going.
- Where are you in the progression — still working on negatives, or starting to attempt chest to bar reps?
- What’s the hardest part of the movement for you right now: the descent, the grip, or the upward pull?
- Have you noticed any other lifts feel stronger since adding pulling work?
Drop your answers in the comments. The more specific you are, the easier it is to give you something useful back.