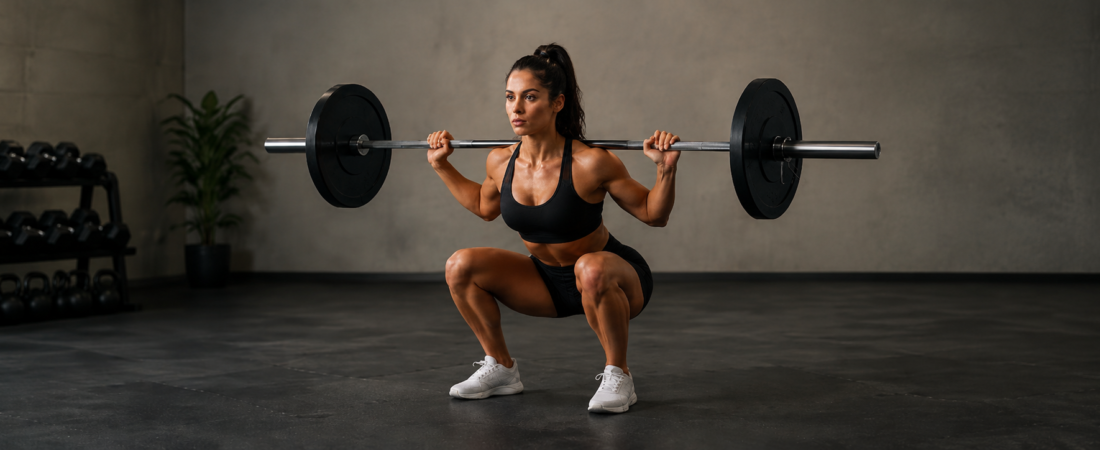
The barbell back squat is widely considered the king of lower body exercises — and for good reason. No machine, no isolation movement, no variation comes close to what it demands from your body or what it gives back in return.
The hack squat and leg press will build your legs. But the barbell back squat does something they can’t — it loads your entire system. The bracing, the coordination, the balance, the full body tension required to move properly under a loaded bar sends a signal to your nervous system that isolation work simply cannot replicate. That’s why the results it produces are in a different category.
It’s also notoriously difficult to execute correctly. Most beginners either skip it entirely because it looks intimidating, or approach it without the preparation it demands — skipping the warm-up, missing the brace, loading the bar before the pattern is solid. Both approaches limit what the movement can do for you and increase the risk of injury.
This post covers how to perform the barbell back squat safely and with genuine precision — the setup, the brace, the descent, the drive. It also covers how to warm up specifically for this lift, how to programme it intelligently, what goes wrong and why, and the accessory work that will keep you progressing long after the initial gains feel easy.
Done properly, this is one of the most rewarding movements you can build your training around. This post exists to help you do it properly.
What Is This Exercise?
A barbell back squat is a lower body pushing exercise where you carry a barbell across your upper back and lower your body until your thighs reach parallel with the floor, then stand back up. It trains the quads, glutes, and hamstrings simultaneously and is one of the most complete lower body strength movements you can do.
What you need: A barbell and a squat rack.
This is a squat movement — your knees and hips bend together to lower and raise your body, the same motion you use standing up from a chair.
Who This Is For
This post is for anyone who has built a solid squatting foundation through the bodyweight squat and goblet squat and is ready to take the next step. If those movements feel controlled, repeatable and genuinely strong — you’re ready for the barbell.
The barbell back squat doesn’t need to be heavy to be valuable. Starting light and learning the mechanics properly is not only acceptable — it’s the right approach. Many experienced lifters return to the empty bar or very light loads when learning a new movement or correcting a fault. There is no shame in it. The bar itself weighs 20kg — for many beginners that’s enough load to feel the movement properly and start building the pattern.
The goal in the early sessions is to find your form and your rhythm under load — not to test your limits. Load the bar progressively as the movement starts to feel natural and controlled. When a weight feels comfortable and your technique is solid, add a little more. That’s the process.
What you do need before you start is the ability to squat with a real brace, feel the right muscles working through the full range of motion, and stand back up from the bottom position with control. If the goblet squat still feels uncertain, spend more time there first. The barbell will expose every weakness the lighter movements allowed you to hide.
Execute this movement with precision and it will yield results that nothing else can match. Sloppy execution, sloppy results.
Come to this movement with patience and it will reward you. Rush it and it won’t.
Sets & Reps
Start lighter than feels necessary. The barbell back squat exposes every weakness — technique first, load second.
When you’re learning the movement:
- 3–4 sets of 8–10 reps at a light, controllable weight
- Every rep should look identical — stop the set if form breaks
- Rest 2–3 minutes between sets
When the pattern feels solid:
- 3–5 sets of 4–6 reps at a weight that requires genuine effort
- Last rep should be hard but form should hold
- Reduce weight immediately if it doesn’t
When you’re ready to push:
- 1–3 reps at or near your maximum
- Always follow with back off sets at 60–70% for 2–3 sets of 5–8 reps
- One heavy session per week — your nervous system needs the recovery
A strong brace means a stronger squat. The difference is noticeable from the very first rep you get it right
The Descent and Drive
Setting up the rack
Before you approach the bar set the rack up correctly. The bar should sit at roughly upper chest height — low enough that you don’t have to rise onto your toes to unrack it, high enough that you’re not having to squat down to get under it. A bar set too high or too low makes the unrack awkward and wastes energy before the rep has even begun.
Set the safety bars next. Position them just below the depth you’ll be squatting to — low enough that they don’t interrupt a good rep, high enough that if you can’t complete a rep you can lower the bar onto them and get out safely. Never skip this step. Training alone without safeties set is how serious injuries happen.
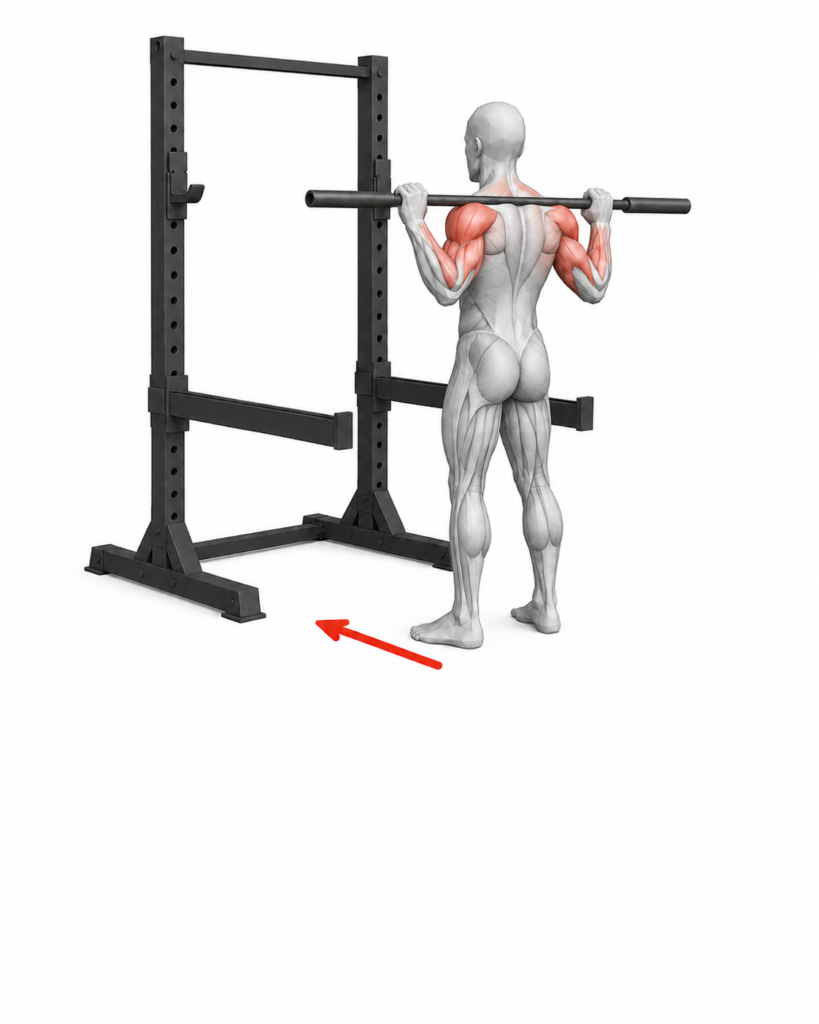
Getting under the bar
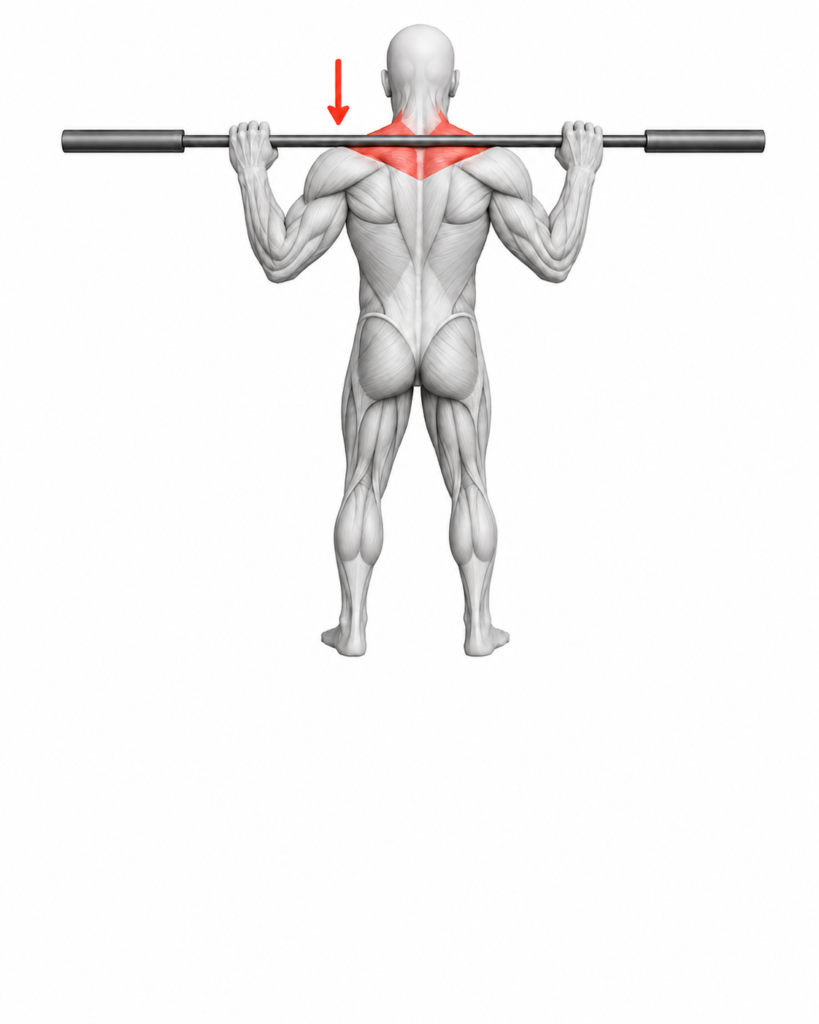
Approach the bar from the front and step underneath it, positioning yourself directly in the centre. Press your traps firmly up into the bar — it should feel secure and stable across your upper back before you unrack. Grip the bar slightly wider than shoulder width, pull your elbows down and back to create upper back tension. When you’re ready, drive straight up with your legs to unrack.
The walkout
Take one deliberate step back away from the rack — just enough to clear the uprights. Set your feet shoulder width apart, toes pointing slightly outward. This is your position for every rep. Don’t shuffle, don’t adjust — set it once and commit to it.
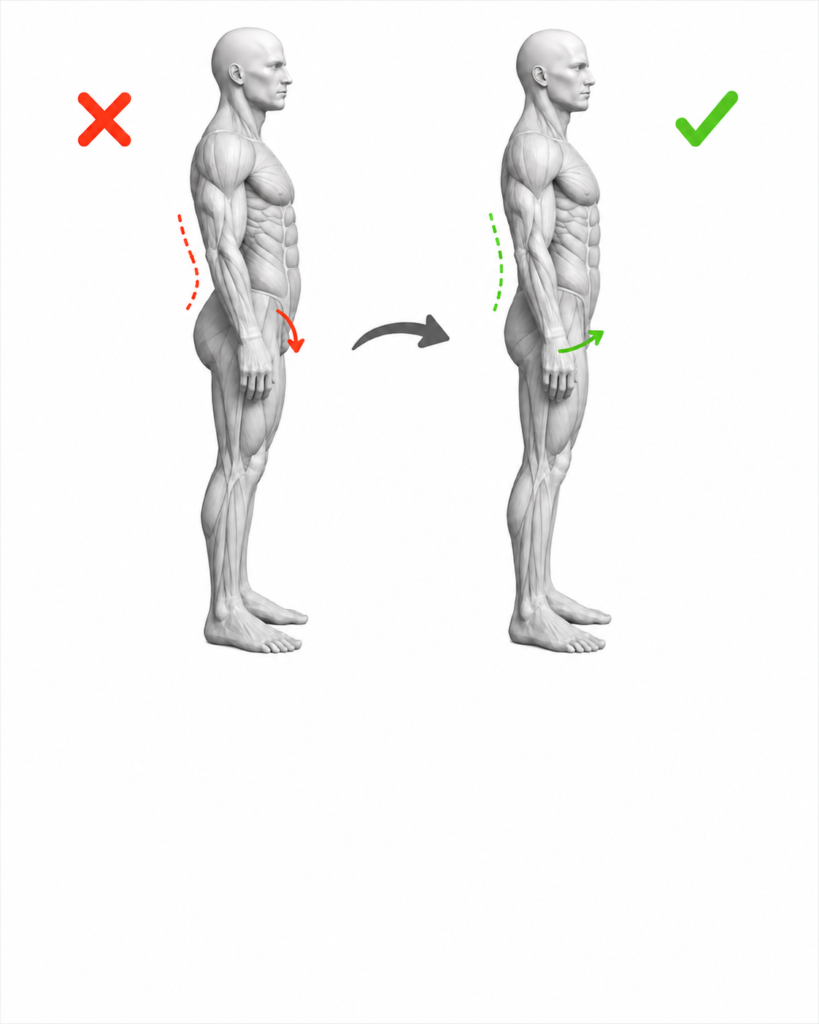
Finding neutral and bracing
With your feet set, tuck the pelvis gently to find a neutral spine — not an exaggerated arch, not a flat back. Take a big breath deep into your belly. Brace everything hard — your midsection should expand outward in all directions, front, sides and back simultaneously. That pressure is your brace. Hold it through the entire rep.
The descent
Push your knees out in the direction of your toes and sit your hips back and down simultaneously. This is not a knee bend — it’s a full hip and knee flex happening together. Think about sitting into the squat rather than dropping straight down.
Keep your chest up and your spine neutral throughout the descent. Your torso will lean forward slightly as you go deeper — this is normal and correct. What you’re avoiding is your chest collapsing toward your knees.
Descend until your hips are at or below parallel — the crease of your hip at or below the level of your knee. At the bottom you should feel loaded tension through your quads, glutes and hamstrings simultaneously. If you only feel it in one place, the position or the brace needs attention.
The drive
Drive the floor away from you — think about pushing the ground down rather than lifting yourself up. Your hips and shoulders should rise at the same rate. If your hips shoot up faster than your shoulders your chest will drop and the bar will shift forward.
Drive through the full rep until you’re standing tall, hips locked out, glutes squeezed at the top. That’s one rep. Reset your breath, brace again, and repeat.
“Every rep is its own event. Set up, brace, descend, drive. No shortcuts.”
Sets, Reps and How to Progress
There is no single correct sets and reps prescription for the barbell back squat because the right answer depends on what you’re trying to achieve and how heavy you’re lifting relative to your current capacity.
That said, here are the frameworks that work well for someone building this movement from the ground up:
Learning the movement — light load When you’re new to the barbell back squat the priority is technique, not load. At this stage higher reps at lighter weight serve you better than heavy low rep sets. The movement needs repetition to become reliable.
3-4 sets of 8-10 reps at a weight that feels challenging but allows every rep to be performed with control. There will be effort — the last few reps should feel hard and you’ll feel significant tension through the working muscles. That’s normal and expected. What you’re watching for is not effort but breakdown — chest collapsing forward, knees caving inward, heels lifting, or the brace giving way. Tension and struggle are part of training. Those specific faults are the signal to stop or reduce the weight.
Building strength — moderate load Once the movement feels solid and consistent, you can begin working toward heavier loads with lower reps. This is where the real strength building happens.
3-5 sets of 4-6 reps at a weight that requires genuine effort. The last rep of each set should be hard but achievable with good form. If form breaks on the last rep, reduce the weight.
Working near your maximum Heavier singles, doubles or triples — 1 to 3 reps at or near your maximum — are appropriate once you have a reliable movement pattern and understand how your body responds to heavy load.
Always follow a heavy single or near-maximum effort with back off sets — drop the weight to around 60-70% and perform 2-3 sets of 5-8 reps. This accumulates volume at a manageable load and gives you the opportunity to practice the movement under fatigue.
Rest between sets Heavy compound work requires more recovery between sets than lighter movements. For your heaviest sets, 3 to 5 minutes between sets is appropriate. Don’t rush this. The quality of your next set depends on how well you recovered from the last one.
Frequency Once a week for your heaviest squat sessions is appropriate for most people. The CNS demand of heavy squatting needs proper recovery time before you load it again. If you want to squat more frequently, make the additional sessions lighter and technique focused — not another heavy day.
“The weight on the bar is just a number. What matters is whether the movement looks the same on the last rep as it did on the first.”
Common Faults and How to Fix Them
Even with a solid foundation the barbell back squat exposes weaknesses that lighter movements allow you to hide. These are the most common faults at this level and what to do about each one.
Chest dropping forward at the bottom This is the most common fault in the barbell back squat. As you descend, your chest collapses toward your knees and your hips rise faster than your shoulders. It usually means one of three things — the brace broke down during the descent, the weight is too heavy for your current technique, or your posterior chain isn’t strong enough yet to support the position under load.
Fix: Lighten the weight, reinforce the brace, and add good mornings to your accessory work to strengthen the posterior chain specifically.
Knees caving inward At the bottom of the squat or during the drive up, the knees collapse inward toward each other. This is called valgus collapse and it’s both a performance and safety issue — it reduces power transfer and puts stress on the knee joint.
Fix: Actively think about pushing your knees outward in the direction of your toes throughout the entire rep. Cue yourself to “spread the floor” with your feet. If it persists under load, reduce the weight until the pattern is stable.
Heels lifting off the floor If your heels rise during the descent it usually means ankle flexibility is limiting your depth. Your body is compensating by shifting weight forward onto the toes.
Fix: The deep squat hold with a weight plate in your warm-up addresses this directly. Over time ankle flexibility will improve. In the short term a small heel elevation — a thin plate under each heel — can allow you to squat to depth while the mobility work takes effect.
Bouncing out of the hole Using the stretch reflex at the bottom to bounce back up rather than driving up with control. It feels like you’re being efficient but it bypasses the most demanding part of the movement and reduces the training stimulus significantly.
Fix: Pause squats. Descend, hold the bottom position for two seconds, then drive up. It removes the bounce entirely and forces you to own the bottom position.
Half reps Not reaching parallel. This is often ego-driven — the weight feels heavy, full depth feels hard, so the range of motion gets shortened to make the lift feel more successful. Half reps at heavy weight build partial strength through a partial range. They don’t transfer to real world movement the way a full depth squat does.
Fix: Reduce the weight until full depth is achievable with control on every rep. There are no shortcuts here.
“If any of these show up consistently, treat them as information — not failure. They’re telling you exactly what needs work.”
Muscles Worked — What’s Actually Happening
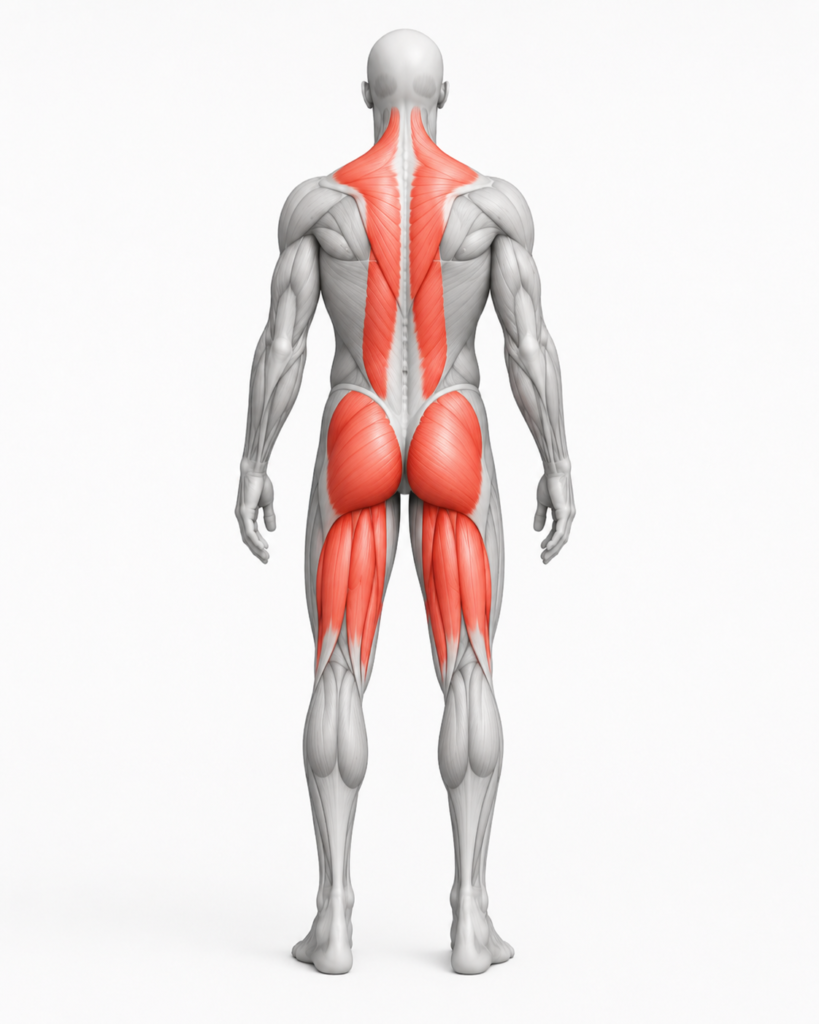
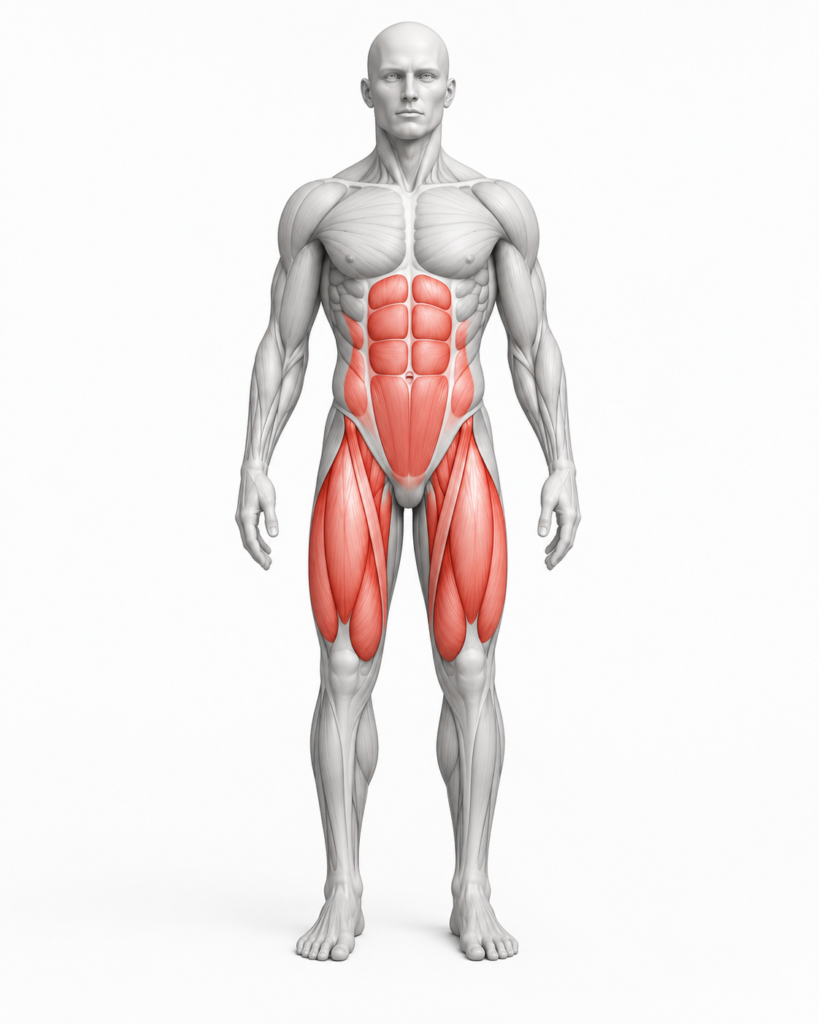
The barbell back squat is the most complete lower body exercise available. No other movement loads the legs this heavily across this much range of motion, which is why it sits at the top of the squat progression and why serious lifters never fully leave it behind.
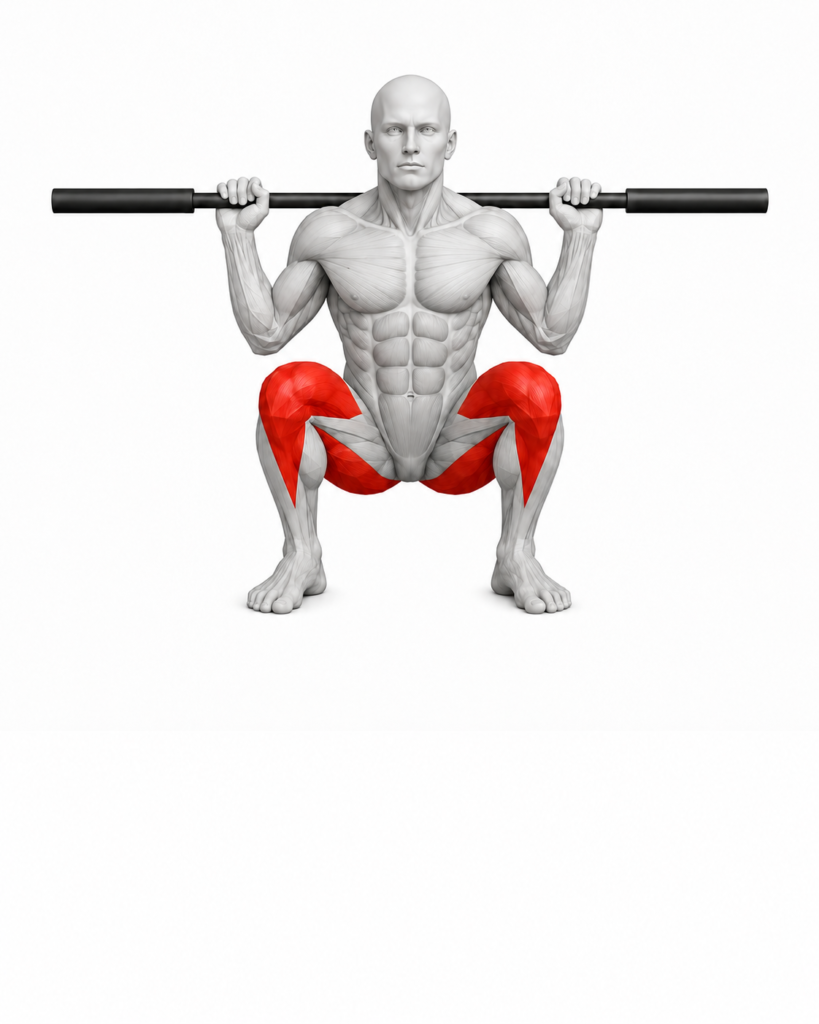
The primary movers are the quadriceps — the four muscles running down the front of your thighs. They control the descent and drive the knee extension that brings you back up. This is why the squat is the definitive quad builder. Nothing else comes close to loading the quads this thoroughly through a full range of motion. If you want stronger, bigger legs, the squat is the answer.
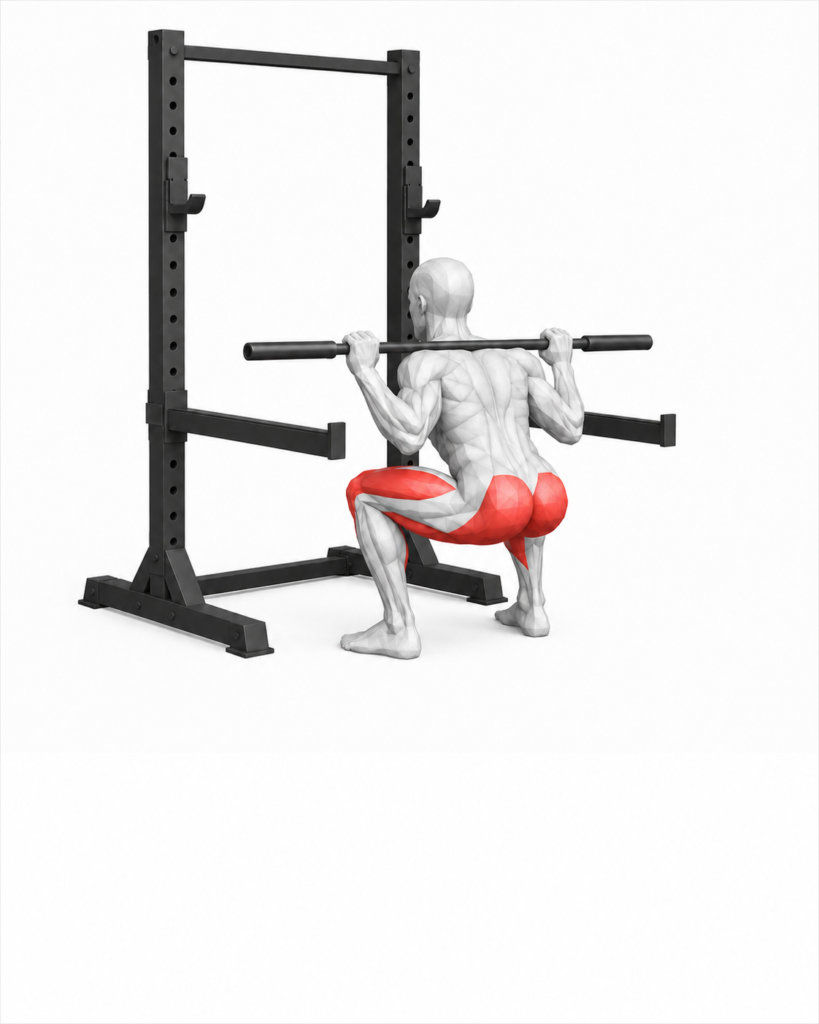
Your glutes and hamstrings are working throughout the entire lift but they earn their keep most at the bottom and through the drive. The glutes power the hip extension that stands you back up, and the hamstrings support that extension from behind. If you feel the squat almost entirely in your quads and not at all in your glutes, your position at the bottom needs attention — hips back, chest up, sitting into the squat rather than dropping straight down.
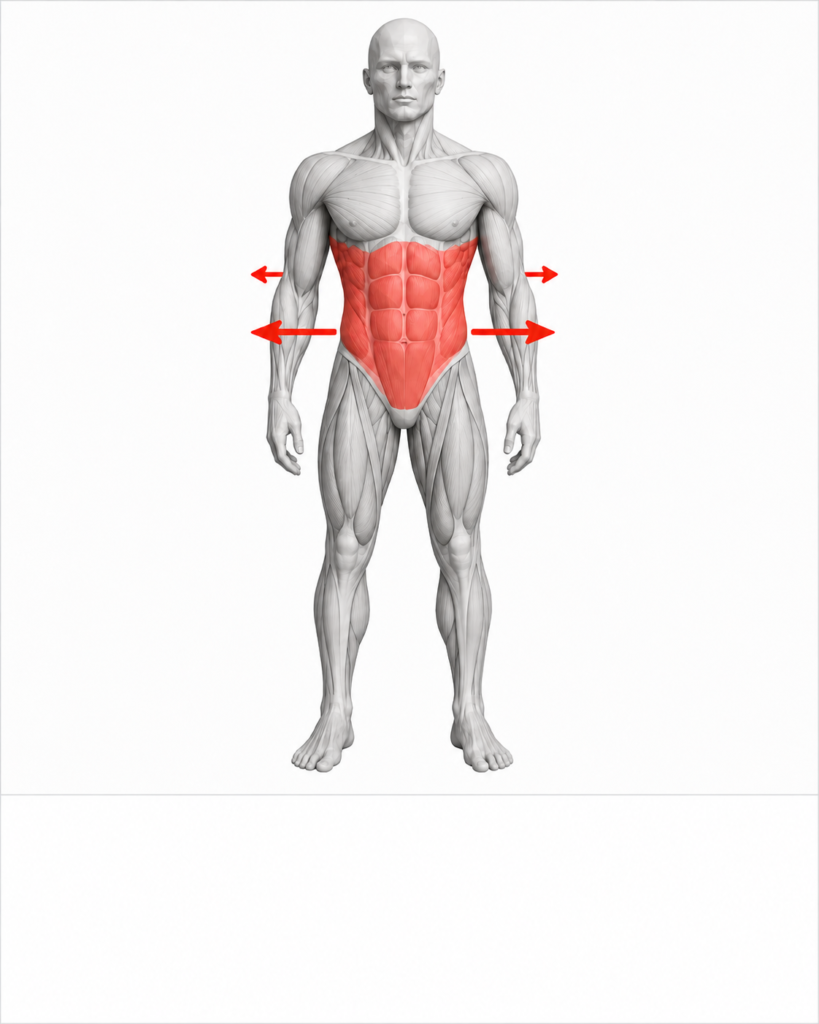
Your core, spinal erectors and upper back are not moving you — they are holding everything together under load. The brace you create before every rep is what keeps your spine safe and your torso rigid as the weight presses down. Your traps are working to keep the bar stable across your upper back. Your calves are bracing your ankle position throughout. The squat is a lower body movement but it demands your entire body — and that full body demand is exactly what makes it worth doing.
Accessory Work
If you’ve worked through this post carefully and the barbell back squat is starting to feel solid, the accessory movements that support it won’t feel foreign. They’re variations and extensions of the same pattern you’ve already learned.
The exercises in the table below each target a specific demand of the squat — posterior chain strength, single leg stability, bottom position confidence, controlled descent. Use them to address whatever feels weakest in your squat rather than doing all of them at once.
| Exercise | What it addresses |
|---|---|
| Good mornings | Posterior chain strength — directly targets forward lean |
| Bulgarian split squat | Single leg stability — exposes asymmetries between sides (also step 4 of the squat progression) |
| Heel elevated squat | Ankle mobility and depth — removes the restriction that prevents most beginners from squatting properly |
| Box squat | Controlled descent and hip hinge — useful for learning depth without compensation |
| Goblet squat | Back off sets — same pattern at lighter load, reinforces technique under fatigue |
Where This Fits
The barbell back squat isn’t just an exercise — it’s a cornerstone movement. Once you own this pattern, a huge chunk of your lower body training starts to make sense. But it doesn’t live in isolation.
If you’re serious about building real, lasting strength as a beginner, it helps to zoom out and understand how training, nutrition, and mindset all work together. The 3 Pillars of Fitness breaks that down clearly — and it’s worth reading if you haven’t already, because squatting consistently is only part of the equation.
On the training side, the squat pairs well with posterior chain work. If you want to reinforce the hip hinge pattern that supports your squat mechanics, the dumbbell Romanian deadlift is a natural companion lift — it strengthens the hamstrings and glutes in a way that directly carries over to how you move under the bar.
Then there’s recovery. A lot of beginners underestimate how much of the actual work happens after the session ends. Eating to support recovery — not just to feel full — is what allows your legs to come back stronger the next time you squat. Put these pieces together and you’re not just doing an exercise. You’re building a practice.
Join The Conversation
Have you tried the barbell back squat? Whether you’re just getting started with it or you’ve been squatting for a while — what’s the one cue or adjustment that made the biggest difference to how it felt?
Drop a comment below. Your experience might be exactly what someone else needs to hear.